 Overlay Pen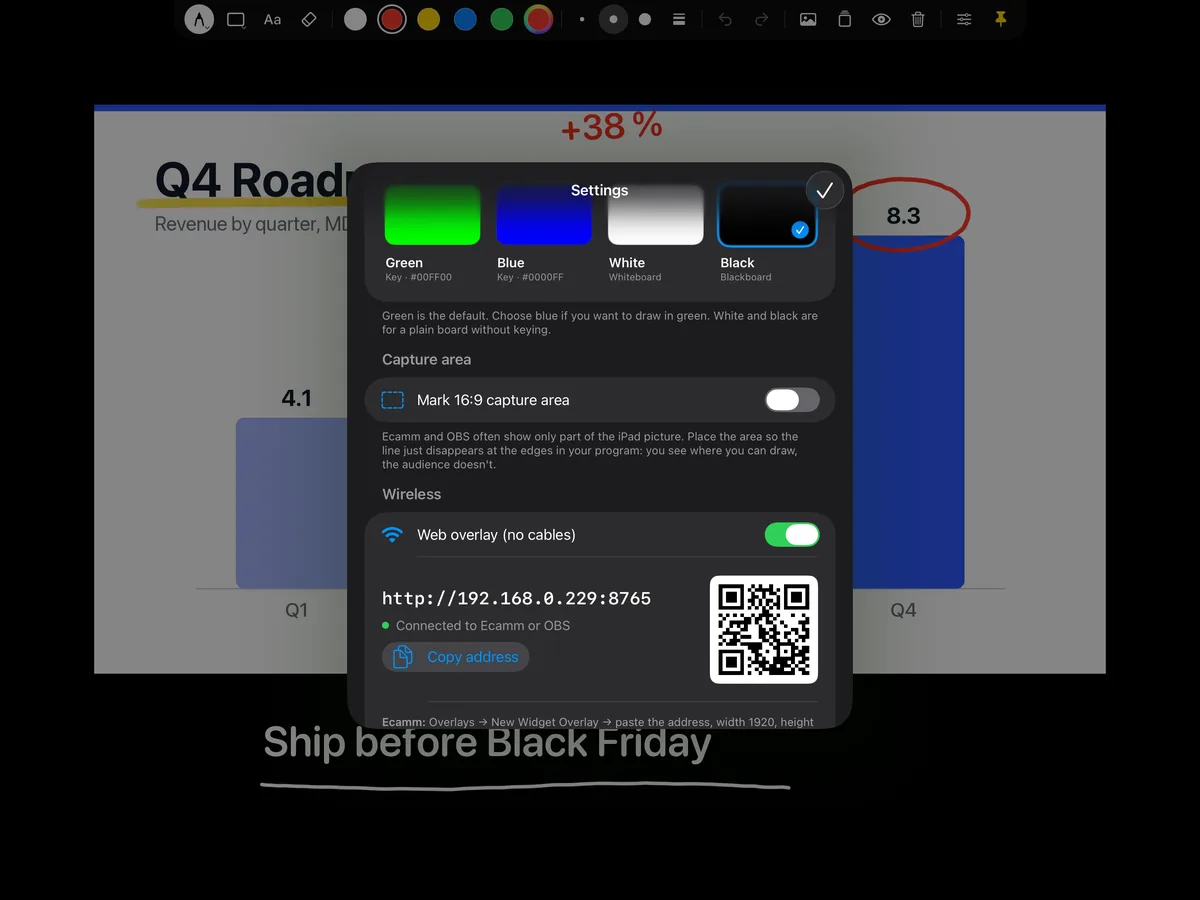
Wireless (recommended)
- Put the iPad and the Mac on the same Wi‑Fi or wired network.
- In Overlay Pen, open Settings and turn on Web overlay (no cables). Note the address, for example
http://192.168.1.20:8765. - In Ecamm Live, choose Overlays → New Widget Overlay.
- Paste the address, set width 1920 and height 1080, and tick Fill Entire Frame.
- Turn on Mark 16:9 capture area in Overlay Pen, so the board matches the Ecamm picture exactly.
- Draw a line. The status in Overlay Pen changes to Connected to Ecamm or OBS.
Over USB with green screen
- Connect the iPad to the Mac with a USB‑C or Lightning cable. Unlock it and tap Trust if asked.
- Open Overlay Pen with the Green background and turn on Mark 16:9 capture area.
- In Ecamm Live, add the iPad as a source and place it as a full-size overlay above your camera or slides.
- Turn on green screen / chroma key for the overlay and pick green.
- If you can see the marker line, open Adjust capture area in Overlay Pen and drag and pinch until the line just disappears at all four edges.
Tips
To use the drawing in Zoom, Teams or Meet, select Ecamm Live Virtual Camera as the camera in the meeting app. See the meeting guide.
Over USB the Mac receives the iPad's full resolution. If only part of the iPad shows, the source is zoomed in Ecamm: zoom fully out.
Other guides: OBS Studio · Zoom, Teams & Meet · HDMI & capture cards